Not much to show tbh because its just surface finishing the leopard has had 3 or 4 coats of sand-able surface primer and now the surface is about as good as its going to get.
So I've move the model into my office and I'm going over any hard to reach areas with blades and picks. Then I have to fix a few details; I need to make a bay door jams (so the door has something to rest on), some details that didn't get printed and a bit of smoothing etc
Monday, 12 January 2015
Friday, 12 December 2014
Sandable primer onto the leopard
So first sand is done (all the blue finder coat off) now its onto 2 steps of sandable primer. This is a primer/filler mix gets sprayed on then sanded back with 400git this should fill any pits on the surface.
I probably do two coats of the thicker surface primer and a 3rd/4th for any trouble areas to get a good smooth surface then a final spray with finer finishing grade primer and 1000grit buff down and we should have a good surface finish. I also have to finish some of the trickier areas (like the intake ribs) using a dremel and buffing bit since there isn't enough room to work with sand paper or a needle file.
Again this is just loose fitted together resting on its belly (no landing gear) with some TT models for scaling.
I probably do two coats of the thicker surface primer and a 3rd/4th for any trouble areas to get a good smooth surface then a final spray with finer finishing grade primer and 1000grit buff down and we should have a good surface finish. I also have to finish some of the trickier areas (like the intake ribs) using a dremel and buffing bit since there isn't enough room to work with sand paper or a needle file.
Thursday, 27 November 2014
Leopard dropship progress
I've been surface finishing the dropship this past few weeks, Progress has been sporadic (new baby and toddler who caught a well timed nasty cold for us to share).
However its looking sweet
After scrubbing the power residue off. I used some left over blue spray paint (wooden truck i made for my son) to put a light coat over all the parts so i could see where i was sanding and make sure I didn't take off any details. I still have the nose to do (its in black because the blue paint ran out) and the underside of the stern then I'll need to use my needle files to get into the nooks sand paper couldn't.
Once that's done I'll give it a wash and then it give it a coat of dissolved putty primer and another fine sand. That should result in a good quality surface finish. Then surface seal it and on to thinking about mould making.
The internet was also down for a few days (its amazing what a pc cant do with out it). But it did enforce a real world job break and give me the chance to make up some instructions for the leopard. Mostly my mech don't need these as its clear what parts are an where they go, but the leopard does have an assembly order which needs to be followed your you'd have to pull glued bits apart and it can be hard to tell which way around some parts go.
I've also added a link on the right had side to my DA finished models gallery. Where you can see everything I have made and painted so far!
However its looking sweet
After scrubbing the power residue off. I used some left over blue spray paint (wooden truck i made for my son) to put a light coat over all the parts so i could see where i was sanding and make sure I didn't take off any details. I still have the nose to do (its in black because the blue paint ran out) and the underside of the stern then I'll need to use my needle files to get into the nooks sand paper couldn't.
Once that's done I'll give it a wash and then it give it a coat of dissolved putty primer and another fine sand. That should result in a good quality surface finish. Then surface seal it and on to thinking about mould making.
The internet was also down for a few days (its amazing what a pc cant do with out it). But it did enforce a real world job break and give me the chance to make up some instructions for the leopard. Mostly my mech don't need these as its clear what parts are an where they go, but the leopard does have an assembly order which needs to be followed your you'd have to pull glued bits apart and it can be hard to tell which way around some parts go.
Saturday, 1 November 2014
Dropship landed
Good news!
The Leopard dropship came yesterday. Its hard to say 100% that it came out great till I get all the media off it and it has a first coat of primer but at first inspection it looks real nice. It came missing 1 part and 1 part needed reprinting so those are getting done over the weekend.
I tempted fate to get some of these shots loosely fitted the body together with no spine just so i could check out the scale (i laid on the turret and the bridge too).
As you can see the atlas stands up fine and I think he;s the biggest TT mech currently. He did have to till to get him in the door and access height will be a few MM lower when the bay doors are on but it was a price worth paying because otherwise the model would of been to expensive to print.
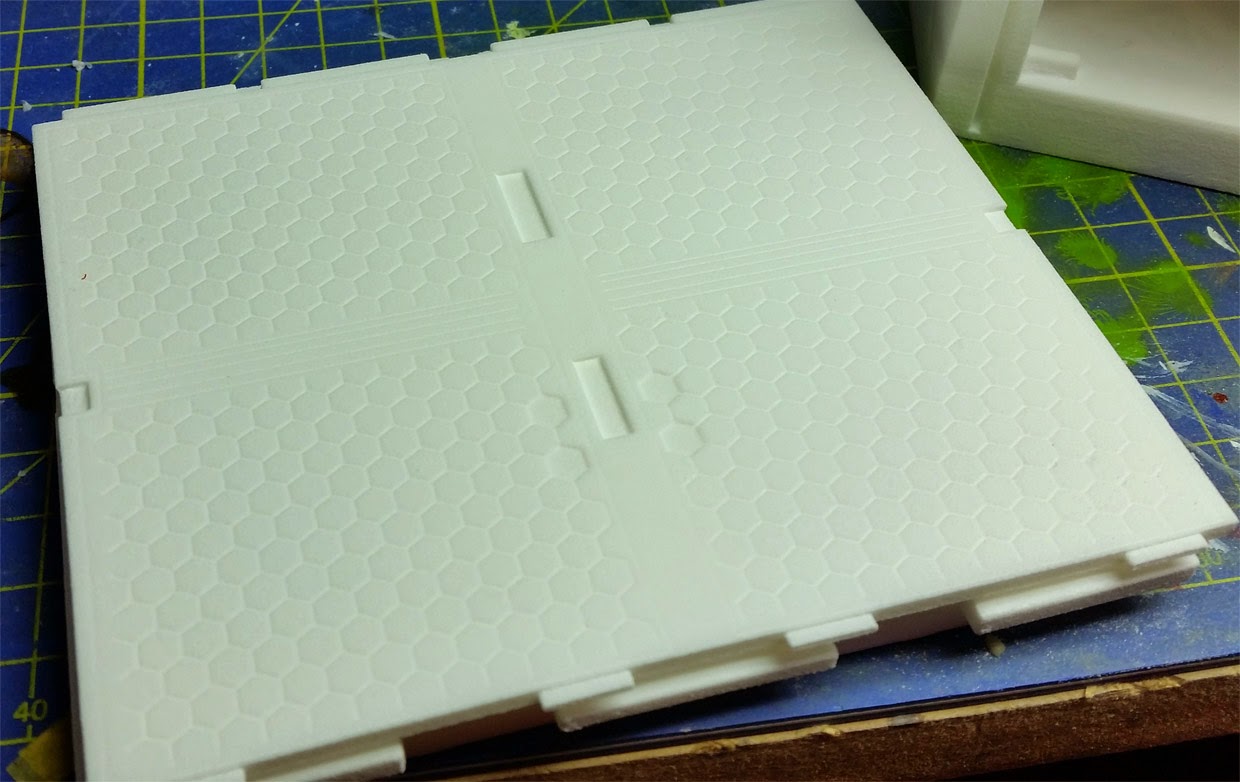
Above you can see the bay floor with the b'tech hex patten and below you can see the ships spine, thruster, and bay doors (inner and outter)
Ok so the badish news;
I had a cut on my leg 2 weeks ago I was trying to ignore it and help the wife by doing her chores/child care (she's pregnant and due 3 days ago, so were very much into over time) but that was a mistake, it became infected and I got seriously ill the last few days and I'm on a strong course of antibiotics. I should be fine but its very painful and I can't walk much, I have to bed rest to get it a chance to heal but that means no progress on any models as much as I'd like to get started.
The Leopard dropship came yesterday. Its hard to say 100% that it came out great till I get all the media off it and it has a first coat of primer but at first inspection it looks real nice. It came missing 1 part and 1 part needed reprinting so those are getting done over the weekend.
I tempted fate to get some of these shots loosely fitted the body together with no spine just so i could check out the scale (i laid on the turret and the bridge too).
As you can see the atlas stands up fine and I think he;s the biggest TT mech currently. He did have to till to get him in the door and access height will be a few MM lower when the bay doors are on but it was a price worth paying because otherwise the model would of been to expensive to print.
Above you can see the bay floor with the b'tech hex patten and below you can see the ships spine, thruster, and bay doors (inner and outter)
Ok so the badish news;
I had a cut on my leg 2 weeks ago I was trying to ignore it and help the wife by doing her chores/child care (she's pregnant and due 3 days ago, so were very much into over time) but that was a mistake, it became infected and I got seriously ill the last few days and I'm on a strong course of antibiotics. I should be fine but its very painful and I can't walk much, I have to bed rest to get it a chance to heal but that means no progress on any models as much as I'd like to get started.
Wednesday, 29 October 2014
Holding a circular patten, waiting to land.
The leopards eta was 7to10 working days and 10working days would of been yesterday. The 3d printers contacted me yesterday to say they were 2days behind (plus a day ro 2 for shipping)
So just a little longer hopefully Friday if not maybe Saturday or worse case Monday (I hate weekends).
In the mean time I've been getting the armorcast vulture and madcat ready to paint. I was thinking for the madcat the same jade falcons scheme (duck egg green and pink accents) but for the vulture this
Which kinda looks something like this from the cartoon Kristen Redmond mech grey/purple/green but i'm not a fan of purple that's going to ceramic red;
I might try to mixed a hint of grey/green for the barrels and a charcoal strip for the nose kinda like this;
My photo shop skills failed me the barrels should be more matte and more subtle tint of green, not sold on the centre being grey either will have to stare at it some more.
And the madcat something like this
Again the green to pink would be much more subtle
So just a little longer hopefully Friday if not maybe Saturday or worse case Monday (I hate weekends).
In the mean time I've been getting the armorcast vulture and madcat ready to paint. I was thinking for the madcat the same jade falcons scheme (duck egg green and pink accents) but for the vulture this
Which kinda looks something like this from the cartoon Kristen Redmond mech grey/purple/green but i'm not a fan of purple that's going to ceramic red;
I might try to mixed a hint of grey/green for the barrels and a charcoal strip for the nose kinda like this;
My photo shop skills failed me the barrels should be more matte and more subtle tint of green, not sold on the centre being grey either will have to stare at it some more.
And the madcat something like this
Saturday, 18 October 2014
TT dragon and cent
degreased given a base coat. They're just free standing in this photo
Not great prints but for the price I wasn't expecting miracles, just some cheerful TT scaled mechs.
Coincidentally a friend had some of his concept art turned into 15mm models and the prints look A1. I'm going to have to get in contact with those guys and see about prices for the bigger stuff.
As for these 2 I'll make a spruce for them and cast them at the same time I do Leopard.
Not great prints but for the price I wasn't expecting miracles, just some cheerful TT scaled mechs.
Coincidentally a friend had some of his concept art turned into 15mm models and the prints look A1. I'm going to have to get in contact with those guys and see about prices for the bigger stuff.
As for these 2 I'll make a spruce for them and cast them at the same time I do Leopard.
Thursday, 16 October 2014
No its not a Borg cube but dropship tetris and hey what did UPS bring me!
This'll be a long post td:lr "leopards gone to the printers, TT scale dragon and cent arrived."
My printer services uses swept volume to price prints, it means you pay for the an imaginary box that your model would fit in. Pricing in 3D priniting is cubed so every mm oversize you playing a hefty multipul for it. But the up side is you can stuff a lot of things in to the void space around and inside larger parts.
The first quote I received was enough to floor me enough to buy a small second hand car. But it was a rough cobble together just to get an idea of cost I knew there a lot i could do to get the swept volume down.
And so began a 2day game of 3D Dropship Tetris. I managed to get a swept volume decrease of 50% yippee!
what you see below is the final result "resistance is futile"
That brought the print into an acceptable price range along with the following adjustments;
- I had to scale the drop ship down to 6.1cm door height (the ceiling I thinned to allow 6.4cm ceiling height) so the altas may have to stoop to get in but that small decrease in high brings in good cost reduction.
- I added a pop-out panel to the dropship nose (top left) to be able to utilise the interior space. I managed to get in one of the thrusters (netting a big cost saving) and a few other odd items. The void space in the nose will be filled and the pop out panel added back for casting.
- I still had some voids left over and decided to fill this with dropship bric-a-brac. I made shipping containers (six), crates (six) and ammo boxes (eighteen). I made them stackable too. You can see them nested in the top right picture. If I have any left over RTV I'll make some casts of those but that's a stretch goal otherwise They'll be for decoration for my personal model.
- I knew all along I would have to go for SLS printing on this. Since it would be larger than the mechs I've printed and cost would be high. SLS is common form of printing and one of the cheapest profession grade prints. However the surface (pitted/printlines) needs a prep and details can easily vanish in the printing process. With that in mind all the details I added are chunky and scaled appropriately for what the printer should be able to do. I have some special filler paint and i plan to spend a good deal of time surface prep'ing the model so that it should be good to paint right out the mould.
So the order has been placed etc is 10working days.
Fresh out the bag. Table top scale dragon and centurion. I'll pop them into the sonic cleaner with some degreaser to get the free off the printing wax. If your wondering the cent looks a little taller but that's just because I didn't fuse his parts before printing so he's a bit stretched. I'll glue him before casting (tosro, left arm, left leg, right arm, right leg) The details aren't going to be super sharp at this scale but they're on par with the metal Battech minis. Just some fun to go with the dropship and scales of the bigger 1/60 stuff.
We expecting another addition to the family before the end of the month (the wife's thinking next few days). So once that does happen it tend to be chaos for at least 6 weeks which dumps us right at the 4weeks of Christmas chaos so more updates might be sparse.
My printer services uses swept volume to price prints, it means you pay for the an imaginary box that your model would fit in. Pricing in 3D priniting is cubed so every mm oversize you playing a hefty multipul for it. But the up side is you can stuff a lot of things in to the void space around and inside larger parts.
The first quote I received was enough to floor me enough to buy a small second hand car. But it was a rough cobble together just to get an idea of cost I knew there a lot i could do to get the swept volume down.
And so began a 2day game of 3D Dropship Tetris. I managed to get a swept volume decrease of 50% yippee!
what you see below is the final result "resistance is futile"
That brought the print into an acceptable price range along with the following adjustments;
- I had to scale the drop ship down to 6.1cm door height (the ceiling I thinned to allow 6.4cm ceiling height) so the altas may have to stoop to get in but that small decrease in high brings in good cost reduction.
- I added a pop-out panel to the dropship nose (top left) to be able to utilise the interior space. I managed to get in one of the thrusters (netting a big cost saving) and a few other odd items. The void space in the nose will be filled and the pop out panel added back for casting.
- I still had some voids left over and decided to fill this with dropship bric-a-brac. I made shipping containers (six), crates (six) and ammo boxes (eighteen). I made them stackable too. You can see them nested in the top right picture. If I have any left over RTV I'll make some casts of those but that's a stretch goal otherwise They'll be for decoration for my personal model.
- I knew all along I would have to go for SLS printing on this. Since it would be larger than the mechs I've printed and cost would be high. SLS is common form of printing and one of the cheapest profession grade prints. However the surface (pitted/printlines) needs a prep and details can easily vanish in the printing process. With that in mind all the details I added are chunky and scaled appropriately for what the printer should be able to do. I have some special filler paint and i plan to spend a good deal of time surface prep'ing the model so that it should be good to paint right out the mould.
So the order has been placed etc is 10working days.
And something that came from UPS today;
Fresh out the bag. Table top scale dragon and centurion. I'll pop them into the sonic cleaner with some degreaser to get the free off the printing wax. If your wondering the cent looks a little taller but that's just because I didn't fuse his parts before printing so he's a bit stretched. I'll glue him before casting (tosro, left arm, left leg, right arm, right leg) The details aren't going to be super sharp at this scale but they're on par with the metal Battech minis. Just some fun to go with the dropship and scales of the bigger 1/60 stuff.
And finally
We expecting another addition to the family before the end of the month (the wife's thinking next few days). So once that does happen it tend to be chaos for at least 6 weeks which dumps us right at the 4weeks of Christmas chaos so more updates might be sparse.
Subscribe to:
Posts (Atom)